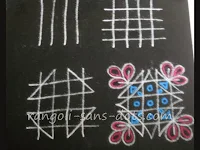
Easy rangoli for beginners 2
Very very small rangoli for daily purpose
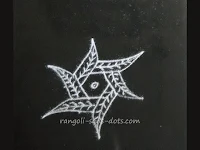
The images below show some ideas of creating easy and simple designs using spiral patterns for our daily purpose rangolis we draw at the entrance
In continuation to a post on easy rangoli for beginners that has images of simple rangoli without dots, this post also has
easy rangoli (without dots) or kolam with dots for starters or learners. It may include free hand rangoli designs involving
two or more steps and some may not be as simple.
Some of the designs are based on central designs of rangolis shared in previous posts. This is a collection of small rangoli designs
or small muggulu designs with images showing steps. Though rangoli can be practised with pencil, sketch pen chalk piece etc traditional rangoli is a class by itself.
Lines with rangoli powder can be drawn as straight and parallel as is possible practically. However the rangoli when
completed gives a very good appearance.
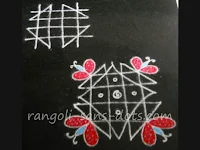
Continuing with simple designs using lines , is the next image below. It is a very easy method of drawing a butterfly rangoli design with a few intersecting lines.
Making easy Diwali rangoli designs step by step / nice patterns
While the central pattern is the same, in the first case leaf like patterns are formed at the edges while in the second rangoli they have been converted into butterflies.
Though the name is Rangoli sans dots , simple rangoli with dots are also to be posted because rangoli with dots is quite popular in many parts of India. The simplest dot grid may be 2 by 2 for a rangoli ( or kolam ).
The rangoli below uses a dot grid of three by three.
The four steps in the photo shows how the rangoli proceeds from the dot pattern to the final design. The final image shows that even with such a small dot grid rangoli can be attractive and beautiful. The next rangoli also uses a 3 by3 dot grid
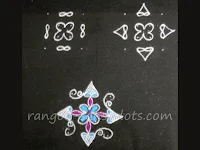
The next rangoli also uses a 3 by3 dot grid. The steps shown in the image are self-explanatory. What is important is the final image shows that a simple yet cute rangoli can be obtained with this dot grid and using some imagination to add some patterns around the rangoli.
The design above is with a four by four dot grid shown in three stages. The first and second stage show how the rangoli is drawn (Since this is post on rangoli for beginners showing the steps will be helpful to many and the main purpose to show the steps for as many rangoli designs as possible through images) .
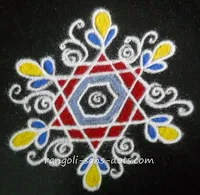
This design on the top is a a plain version of a rangoli usually used for Pooja. Two triangles opposite to each other are drawn and a hexagonal pattern is formed around it. The edges are decorated with floral patterns and spiral designs.
I always felt that most simple kolam designs that are drawn free hand can be drawn with a dot grid the vice versa also being probable . The rangoli above with colours added. I have not tried whether it fits into a dot pattern. Please try, I think it may not be easy.
This is the latest addition to the simple rangoli for beginners or kids collection . This post is a competitor for my post on easy rangoli for beginners !.
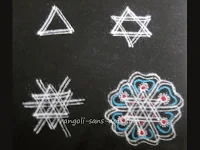
Now coming to the rangoli, this is a star design drawn with two inverted triangles ( that many of us are familar with, we have been doing this even during our child hood ).
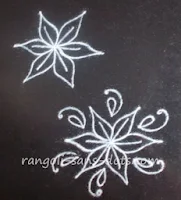
Now that the star is ready, connect the edges with a floral petal design using rangoli powder, one more floral petal can be added to improve the design.
.jpg)
A basic double line rangoli or kolam
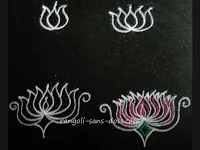
The image below shows a double line or parallel line rangoli in a few steps - to get a floral design from a basic geometric ( triangle ) shape at the centre.
Free hand rangoli birds designs
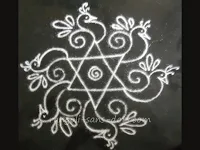
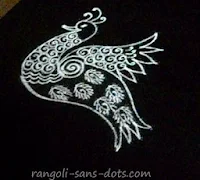
This rangoli design, is a simple one that can be drawn in three or four steps. First draw two inverted triangles ( as usual ) to get the star pattern. From each edge curlicues.Add curved lines to form the head and body of the bird. Add a beak, three feathers to denote the tail and a crown. ( Quite a simple way of drawing birds ! ).
Now some simple chukki rangoli / chuki rangoli
Another simple rangoli type ( that has been already been discussed in Rangoli-sans-dots ) is the maavilai kolam or mango leaves design. I have drawn one with 7 dots and one design with 5 dots. This one is quite common and is frequently seen at the entrance of many houses.
The dot pattern is 5-4-3 interlaced dots. Draw the straight lines at the centre and connect the remaining dots to get the mango leaves. Draw the midrib as a free hand design. The three images below show the steps from the dot pattern to the final design.
These designs can also form the basis for an idea for summer camp arts and crafts activities for kids.
Rangoli can be one of the classes in these camps
A very small floral rangoli design with three dots !
It is possible to draw a floral rangoli design with just a 3 by 3 dot pattern. How - the image below shows how to draw it. I have used a 3 by 3 dot grid. Around each dot on the four corners draw petal like patterns and at the centre draw a pattern of your choice.
It may be a floral design or any other pattern. Add colours. So even through a basic rangoli design we can have beautiful and cute designs.
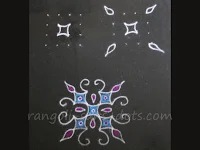
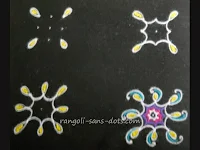
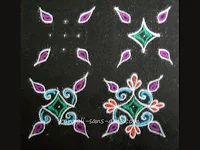
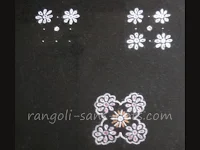
The next design is a small rangoli with dots. The dot pattern is used in four by four. The first image shows the dot grid with the central pattern. The second stage shows the four petal designs drawn on the four corners and then below the final rangoli.
Butterfly rangoli design dots for Sankranti muggulu designs
How to make a kolam - floral patterns in few steps
This is the first type where we have two layers of petals - this can be used to represent the petals or corolla that are lobed and have multiple layers of petals. I have shown two layers .
This Flower kolam without dots has been drawn using the method shown above. The design below, a simple floral design that can be drawn for festivals like Varalakshmi Vratham and Navratri. It shows layers of petals one above the other. We can add any number of layers.
This is another version of flower rangoli design with the central portion more pronounced with a single layer of petals ( or corolla ) that are arranged beautifully and symmetrically around the - shall we call it stamen !Nature is really awesome , isn't it ? These hand drawn patterns are a humble attempt by us ( humans ) to imitate nature.
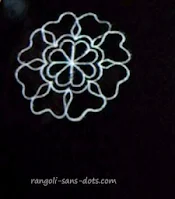
Making a floral pattern in a rangoli or kolam with dots is also an important element in drawing rangoli / kolam. One of the simplest methods through which a six petal flower is drawn as shown in the image below.
Connect the dots through three straight lines intersecting at a point as shown. Three dots are connected at a time to get a small floral design. Connect the ends of the lines through petal like shapes as shown in the photo.
Drawing curved lines to make the petal appear as lobed makes the design appear more naturalistic and more beautiful.
Floral petals through steps in kolam
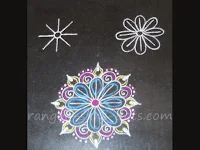
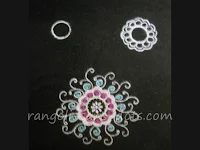
On the top a floral rangoli design - in three ( simple) steps. It starts from a series of lines radiating from a small circle. Around these are drawn the floral petal designs ( in step 2 ) . The rangoli is finished as shown in the colourful rangoli at the bottom.
Here our imagination comes into play and the patterns and designs can be added according to our imagination but the same time matching the basic designs. Add colours to complete the colourful design.
Simple floral rangoli
Another version of a floral rangoli design some what similar to the rangoli above
Rangoli-sans-dots literally means, rangoli without dots ( I have been posting designs with dots and without dots in various categories like free hand designs, designs with 4 to 15 dots and also arts , crafts festival celebrations and decoration ideas ).
The image above is yet another floral rangoli design , a simple one for learning for the ensuing festival season in India including the English New Year, the Tamil harvest festival Pongal and Makara Sankranti. It can also be stopped at an intermediate step..
simple kolam with deepam designs for karthigai
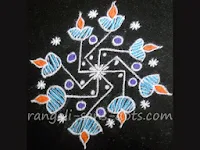
The rangoli in the image above is a very simple swastik and diya (or deepam) combination. Draw the four lines at the centre so that they intersect as shown. Expand the arms to get two swastik patterns the second one inclined to the first. Draw simple diyas at the end of each arm. Fill the gaps with simple patterns as shown. Two photos showing stages in the rangoli - above
Swastik and diya are widely used in rangoli design. This one can be categorised as a simple rangoli and hence has been included here also. Draw the the pair of swastiks, extend the arms further, add simple diya (or deepam) designs to get the final rangoli. The rangoli can be decorated between the diyas or between the arms with simple motifs.
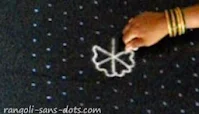
Another simple rangoli in this series of basic rangoli designs for learning. Draw the three intersecting lines meeting at a point ( geometry ! ) and draw the floral petals as shown in the first image. The lines as a result look like mid-ribs of the leaf ( botany ! ). It is better to add some patterns between the leaves to improve the rangoli. So I have added some common motifs that are usually used in free hand rangoli designs as shown in the second part of the photo.
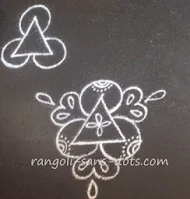
The second rangoli in this seris - Draw the triangle and three segments around the three edges. The gaps between the circular patterns are further decorated as shown and the area inside the circular segments decorated with lines and dots.
A simple rangoli but beautiful. Inside the triangle we can add any pattern should further improve the appearance of the rangoli
Rangoli and nature and from nature
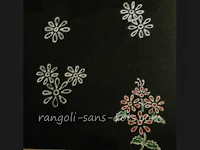
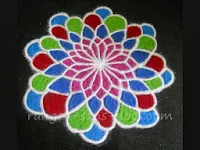
I think that we have to imitate nature for our rangoli designs. Colourful flowers are definitely the most sought for the patterns in free hand. The flower design is a free hand design. The basic design has seven petals. The flower is expanded by another three layers to make it a four layered flower.
Of course, layers of petals or any other motif can be added to this rangoli. I have used different colours for each layer of petal.
A multi-colour (!) flower with multiple layers(!). Rangoli is kolam in Tamil, muggu in Telugu, rangoli in Kannada, rangavalli in Telugu .......There may have been differences in the method of drawing these designs in different parts of India.
It is possible to draw rangoli designs with some straight lines, circles and other geometric patters like triangles. One such design is shown above. The step by step method for drawing the rangoli drawn above has not been added because this quite a simple and easy rangoli.
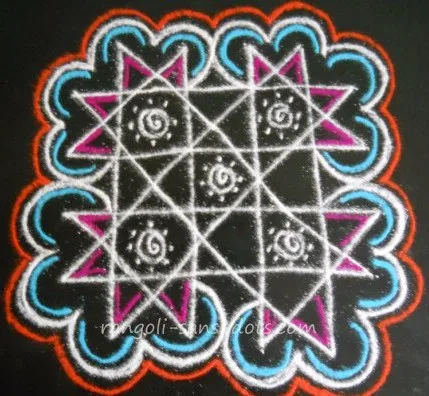
However two versions of this design are shown above. this rangoli has been decorated with colours and some patterns inside and outside to get the final design. First draw four parallel lines and then draw four parallel lines perpendicular to those drawn first. Then join them as shown to get our rangoli. Simple geometry and symmetry.
However viewing the video will give an idea as to how this free hand rangoli can be drawn and it is available on my YouTube channel.
The rangoli can be left plain as shown in design below. The final rangoli results from addition of colourful lines parallel to the existing straight lines and the curved border designs as shown. One more difference between the black and white design below and the colourful one above is the addition of dots around the spiral patterns. The combinations that can be got from a basic design are infinite. You can also choose your own combination of designs at the centre - it could be circles or small stars or floral petals.
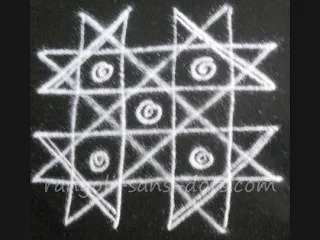
This is another stage of the plain rangoli and can also be used as a simple rangoli design with straight lines parallel and intersecting. Quite an easy rangoli. Here again after drawing the lines one can choose any pattern in the centre ( remember playing tic tac toe !). We can choose any pattern on the outside too.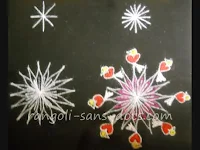
The scene outside the window of a fast moving train is very familiar to all of us. We have seen different types of colourful birds sitting on the electric lines or flying around above the fields. The rangoli above is an inspiration drawn from the birds.
Comparing both these designs will give us an idea on the effect of colours. Plain and white rangoli designs are also beautiful in their own way. As in the case of many design two intermediate steps are also shown.
The next kolam is a simple bird design drawn free hand. I have emphasised many times in the past that rangoli or kolam gives a lot of scope for imagination and the beauty of this art is the simplicity and hence exact depiction of birds or flowers is not the rule.
Just have poets have licence to err grammatically and there is also what is called historical licence so also there has be an artistic licence in the case of kolam! (says my family ! ). So here is it is representation of a bird through a simple kolam.
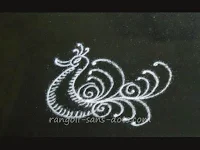
Start with the tail first drawing the two spirals . Add curlicues to improve the beauty of the tail. Add the third spiral and corresponding curlicues. Draw the body of the bird, add the beak and crown. If required a few colours can be added.
Though birds need addition of colours I have left this kolam plain for a change.
Different birds rangoli or kolam for Diwali
Probably one of the most beautiful and colourful birds is the bird of paradise. ( My husband says he discovered(?) it when reading a Willard Price adventure book as a school going boy. Without internet access children reading books were left to imagine how beautiful a bird is and relied solely on the description given by the author.
This rangoli below is inspired by the Wilson's bird of paradise, particularly the tail but honestly it is a poor imitation of the bird's beauty or colour. This rangoli has been drawn free hand for Diwali
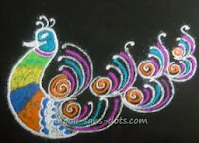
Holidays ( summer or Navaratri or Christmas holidays - these are times when school going children have their holidays in Tamil Nadu ) are a wonderful time for kids to learn a new art and kolam should be accorded importance. So another set of kolam designs for beginners and children .
Start with a spiral pattern at the centre surrounded by four more on four sides. Expand the rangoli from here with three curved lines and around them draw the wing like design!
More small floral rangoli designs for simple Sankranti rangoli
An example of drawing or making a free hand rangoli for Diwali.
The free hand rangoli above in the series of colourful simple free hand rangoli designs
. This is also a very simple floral free hand rangoli and is an improvement of the previous one. Draw the basic design with white rangoli powder. Draw petals as shown, an eight petal flower. Around this flower draw the outline twice.
. This is also a very simple floral free hand rangoli and is an improvement of the previous one. Draw the basic design with white rangoli powder. Draw petals as shown, an eight petal flower. Around this flower draw the outline twice.
Fill the design with petals with two colours, blue and red in this case. I think we can take the liberty of filling the colours we like without any restrictions.
Hence the petals are of different colours in this rangoli. Fill the two outer borders with red and then pink. I have drawn some arrow shaped designs along the border. We can add leaves or any other designs on these arrows. I have not done so, for a change.
Finally decorate with simple patterns on the petals and on the border with white rangoli powder. . ( Where do I draw these is the million dollar question on the minds of my friends and relatives when they give their feedback. I find that there are many clues in the images themselves.)
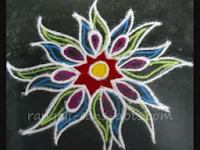
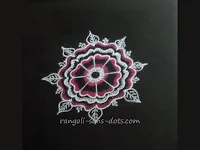
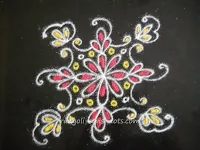
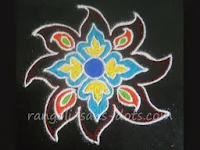
The rangoli on the top is a simple free hand kolam or rangoli with many petals. It is quite simple and easy to draw this design. Add a few colours along the lines of the rangoli without filling up the entire rangoli to finish it in no time.
Such designs can be used regularly since they are not time consuming. Simple patterns can be added between the petals they may be just some patterns or leaves, tendrils or anything related to petals to improve the rangoli design.
The rangoli design next ( above this design ) is a simple but beautiful floral design that can be drawn in a very short time.
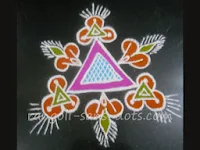
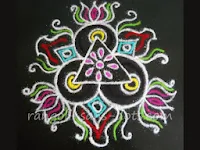
The rangoli below obviously has a triangular pattern at the centre. Floral designs were added at the edges but it seemed to be too simple. So I added three more designs at the centre of each side. While the pattern at the edges have three lobes the one at the centre has two lobes
Finally colours and a few leaf like designs are added to get this simple rangoli. Using just a triangle and making use of the edges of the triangle and sides we can get a simple but meaningful (!) rangoli.
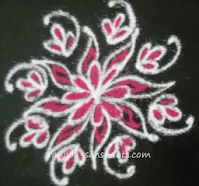
Another free hand rangoli with just two colours white and pink similar to the rangoli above It is quite a simple design. Draw the central flower and add more petals between the petals as shown in the image. On the outside (periphery) add more three petal floral designs. Only pink colour is added to the plain design..
simple rangoli with simple designs that can be drawn for Navratri kolu or Dasara
The muggu below, another free hand design. The central multi-petal design forms the base for this. Decorated with simple patterns between the petals, adding the right colours and method (either filling up or additional colourful lines ) results in this naturally symmetrical design.
This is a colourful rangoli of one drawn in one of the first posts showing how to make a rangoli ( or muggu)
The rangoli above is a very colourful rangoli using swastik as the base. Draw a swastik first and another one overlapping the first one to get eight arms of two swastiks. Expand along the arms with simple designs on each arm to draw the rangoli.
Colour all the arms brown ( any colour can be used. The designs at the top of the arms are filled with bright colours like orange, yellow and green.
I have used each colour for opposite arms. A single colour that matches with brown can also be used to get the final design. Place some dots along the extended arms. The design can be stopped here or can be further enhanced by filling the gaps with some motifs and drawing borders around the rangoli. The options are infinite.
Also the entire background can be filled with a suitable bright colour. Swastik is regularly used in rangolis. 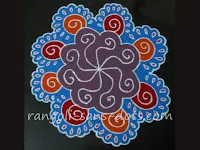 In this series of Kolam ( rangoli ) designs one of the many colourful ones It is quite a simple one expanded from a few intersecting lines. Of course it will look more attractive with colours and that is in .....
So what is the best kolam design for a festival or occasion. Kolam means beauty so there is no design than can be termed as the best. All kolam designs are equally good, one better than the other!
The basic design at the centre decorated with spiral borders and they in turn have mini petal or leaves as borders around. Finally an encompassing border matching the contours formed due to the petals to add beauty to the kolam.
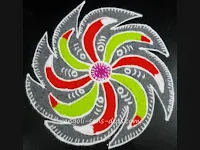
Mandala type free hand rangoliA free hand rangoli with arms radiating from the centre resulting in a near circular shape and hence a mandala design !.. Draw a circle at the centre from that draw curved arms radiating from the circle. I have drawn eight arms.
Enhance the image with more curved arms encircling the rangoli. Fill the outside with grey rangoli . The inner arms are filled with red and light green colours as shown.
The muggu below, another free hand design. The central multi-petal design forms the base for this. Decorated with simple patterns between the petals, adding the right colours and method (either filling up or additional colourful lines ) results in this naturally symmetrical design.
This is a colourful rangoli of one drawn in one of the first posts showing how to make a rangoli ( or muggu)

In this series of Kolam ( rangoli ) designs one of the many colourful ones It is quite a simple one expanded from a few intersecting lines. Of course it will look more attractive with colours and that is in .....
So what is the best kolam design for a festival or occasion. Kolam means beauty so there is no design than can be termed as the best. All kolam designs are equally good, one better than the other!
The basic design at the centre decorated with spiral borders and they in turn have mini petal or leaves as borders around. Finally an encompassing border matching the contours formed due to the petals to add beauty to the kolam.
Mandala type free hand rangoliA free hand rangoli with arms radiating from the centre resulting in a near circular shape and hence a mandala design !.. Draw a circle at the centre from that draw curved arms radiating from the circle. I have drawn eight arms.
Enhance the image with more curved arms encircling the rangoli. Fill the outside with grey rangoli . The inner arms are filled with red and light green colours as shown.
The kolam design shown above is of course a free hand pattern drawn using many patterns and motifs combined using our imagination. The final rangoli with decorated with colourful lines along the designs to get this simple design.
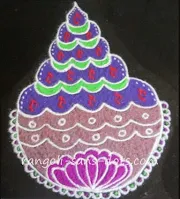
The kolam above depicts a kumbha type lamp that is lighted in temples of Tamil Nadu when aarti is performed. A free hand design with 15 jyoti shown on one side i.e the front view with some simple floral decorations at the base and simple borders outside.
The entire design is filled with brown, blue and green colours as shown. Start drawing from the base and proceed to the top.
The free hand rangoli has a variation of curved patterns at the centre. Around this two types of designs are drawn/. They are drawn from one's imagination and cannot be thought of represent anything particular in nature. Four of each design or pattern are drawn around the centrral design.
The outermost pattern is drawn with simple curved lines. They are filled with red and blue colours alternately. Finally, the design is decorated with white lines on the outermost patterns and also where ever possible in the rangoli. Deepavali is a season for colourful rangoli or kolam
Paisely motif in rangoli / kolam - theme butterflies Paisley designs are one of the most sought after patterns. Not surprising that I have used a few so far in Rangoli-sans-dots. It is called mango design in Tamil as it resembles a mango hanging from a tree. Paisley patterns are used in sarees , curtains, jewellery ( mango necklace is quite popular in Tamil Nadu ) and of course rangoli or kolam designs.
It is called mango design in Tamil . While rangoli or kolam themselves are considered auspicious (rangoli are drawn daily in some parts of India at the entrance to welcome guests, to improve the ambience, colourful rangoli decorate the house on special occasions ) certain patterns that are part of a rangoli are also considered favourable or bright and paisley designs, mango leaf,lotus are among them.
So this series of rangoli will focus on the use of paisley designs in rangoli ( and not jewellery at least not at present because a post on how to make artificial jewellery is long over due )
The first rangoli (free hand design ) is a simple example of how butterflies can be drawn using paisley motifs. (Please note that when you use rangoli powder with your fingers you can achieve perfection as possible by us humans ).
Draw the eight paisley designs on four sides with a pair of designs forming one set of wings. Since the thorax is already there formed due to the intersection of the paisley patterns add the head and the antennae.
The area at the centre is filled with colour and some floral patterns (after all butterflies and flowers have a symbiotic relationship ). Fill the colours of the wings as you wish
Nature has taken the liberty of giving beautiful and variety of colours to butterflies with so many different patterns on the wings. So we can also take some liberty and add colours to the butterfly design.
Why do we draw rangoli using just white rangoli (powder )
Rangoli use colours to draw lines or patterns and for filling up . But some in Rangoli-sans-dots are drawn with white rangoli powder only. This is because, while we can use those with colours (!) for special occasions, the white ones can be used as customary rangoli.
Obviously, the time taken for colourful patterns to be drawn in more and hence invariably can be done on holidays for festivals. Of course, our spirits are also high on these days and hence we are willing to strain ourselves more. Also there is a tradition of drawing kolam in Tamil Nadu daily for which white or plain rangoli designs without colour are used.
What do you do use to decorate a plain or white rangoli ?
Plain rangolis can be filled with colours like a colourful rangoli, or decorated with just one additional colour as in a rangoli for Diwali. Of course for Diwali season they can be decorated with diyas inside the rangoli, around it or decorated with flowers .. the options are many. Only our imagination is the limit.
. How to draw rangoli with rice flour or commercial rangoli (powder )
The powder or flour is taken in the right hand and using the thumb and index finger the powder is sprinkled gently to form lines. With practice, straight lines, curved lines, patterns and motifs can be drawn
.Though there are different ways of drawing a rangoli using kolam podi ( or rangoli powder) is the method followed now. Also we can mix rice flour with rangoli powder Change the ratio according to your convenience Use the thumb, index finger and allow the powder to flow between the thumb and forefinger to get a line. It comes with practice.
Rangoli-sans-dots so far - round up and updates
Many topics have been covered so far, (some have been updated, re-organised) the idea is to make Rangoli-sans-dots as user friendly as possible and to cater to different interests..
Initially, kolam with parallel lines ( my forte or weakness ) simple ones with white rangoli powder were drawn in a few posts. Popular among them is Rangoli -parallel lines. Kolam with parallel lines drawn using rangoli powder and making use of the thumb, fore finger and index finger while drawing the kolam, to get the double line design as it also called.
By what ever name it is called a rose smells sweet similarly rangoli goes under the names, kolam muggulu, rangavalli, alpona and many other names. Some designs have been categorised under muggulu
Mehndi rangoli design and Sanskar Bharti rangoli are two important types of rangoli. Mehndi rangoli design involves drawing designs that are very similar to henna or mehndi designs however on a floor with rangoli . Sanskar Bharti rangoli are drawn on the floor with free hand designs with white rangoli powder drawn on a background created by sprinking rangoli . Some articles are devoted to them.
Kolam making is an important part of many a festival celebration. Navratri and Diwali are among them. Almost all designs drawn so far under various categories have been free hand designs with a few kolam with dots. However more kolam with dots designs are planned for the future.
Of the many posts for Navratri kolam and Deepavali kolam, Diwali rangoli - theme diya ( For Diwali and Karthigai, both being festivals of lights in their own way, importance is given to diya or deepam designs ) and Navratri festival are a few.
Apart from these there are many free hand designs, simple and colourful
Where there is a tradition of drawing kolam daily, the need for newer and different designs is more. So some have been placed under apartment kolam and daily rangoli. They are all simple with or without dots and plain and white designs.
Apart from these there are many more designs and categories in Rangolis sans dots. They are simple sikku kolam designs, rangoli or kolam borders, small rangoli or easy rangoli for beginners and quite a few plain and white rangoli designs that can be used for colouring activities.

