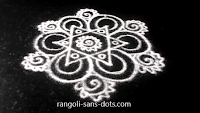
Black and white rangoli designs kolangal
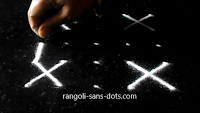
The dot pattern used is 5 by 5 . First mark the multiplication sign like pattern at all four corners.
Connect them with parallelogram shaped patterns. I use photos with the position of the fingers in most cases to make the images more user friendly.
believe that it helps the user to immediately focus on where the rangoli is progressing. I hope it is so.
This is more useful in bigger kolam and will be useful for beginners for all sizes of kolangal.
The next step shows how the design develops further.
This is more useful in bigger kolam and will be useful for beginners for all sizes of kolangal.
The next step shows how the design develops further.
The bottom right corner shows the rangoli in a previous step where two inclined lines are drawn . They are converted into the shapes shown on the bottom left. This is done on all four sides.
The remaining steps are quite easy. Add some lines and dots inside and shade both sides of the parallelogram to get a simple and beautiful rangoli.
The next white rangoli on a black ground ( I use a granite slab for my rangoli designs for my blog ).
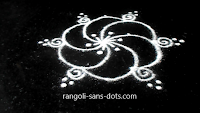
It is a classical design that forms a pumpkin like pattern. It looks like a sweet pumpkin when viewed from the stop with striations and all. Though it is quite a simple design, the final picture will be attractive only if we draw smooth curved lines connecting the dots. The steps should be easy when the images below are seen. All the curved lines start from the centre and end at the top passing through three dots.
The dot pattern used in 5 by 3 . Idukku pulli patterns are more suitable for drawing smooth curved lines due to the nature of the dot grid where we get more options .
The photos show how the curved lines drawn arising from the centre form layers of the pattern.
small chukki rangoli steps
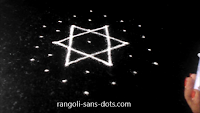
Using some of the remaining dots connect the inner edges of the star with circular rangoli patterns.
This leaves only one dot , convert it into a spiral pattern
For making the kolam more attractive the spiral designs are decorated and one more circular pattern is also drawn inside.
The kolam after completion with a spiral design at the centre and associated decorations.
The next white rangoli on a black ground ( I use a granite slab for my rangoli designs for my blog ).
It is a classical design that forms a pumpkin like pattern. It looks like a sweet pumpkin when viewed from the stop with striations and all. Though it is quite a simple design, the final picture will be attractive only if we draw smooth curved lines connecting the dots. The steps should be easy when the images below are seen. All the curved lines start from the centre and end at the top passing through three dots.
The dot pattern used in 5 by 3 . Idukku pulli patterns are more suitable for drawing smooth curved lines due to the nature of the dot grid where we get more options .
The photos show how the curved lines drawn arising from the centre form layers of the pattern.
small chukki rangoli steps
While placing a dot grid the space between the rows and any two dots in a row are very important. We should have the optimum space . This comes with practice. Too much space will affect the beauty of the rangoli and too little space will make the designs appear sort of compressed or cramped for space.
The dot grid is 7 by 4 idukku pulli
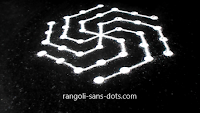
While the previous design was formed by connecting the dots with curved lines. This rangoli kolam is formed by connecting the dots with straight lines. I think the curved lines are more beautiful, are'nt they. ( chukki rangoli 7 by 4 )
After connecting the dots , place bullets on the spot where the original dot grid was placed and press them gently with the finger so that they are flattened to get a beautiful effect for the kolam. I have used white rangoli powder since that is the theme we have used for this blog post.
We can use various colours also to get a suitable combination with matching or contrasting colours and that should not be too difficult for us women , because that is what we are always doing choosing matching or contrasting colours for dresses !
We can use various colours also to get a suitable combination with matching or contrasting colours and that should not be too difficult for us women , because that is what we are always doing choosing matching or contrasting colours for dresses !
7 to 4 dot rangoli designs with steps
This is a very simple kolam as is evident from the steps shown in the picture. After placing the dot grid, draw the star pattern.Using some of the remaining dots connect the inner edges of the star with circular rangoli patterns.
This leaves only one dot , convert it into a spiral pattern
